
To show you the Awesomeness of PowerCLI + Windows + Docker, I’m going to walk through the setup of Installing Docker on Windows, Pulling an Image, running the container, performing a task against a VMware infrastructure and interacting with a MySQL database.
I mentioned in my last post, that the reason I need a Windows container for PowerCLI vs. the Linux, is due to some .net assemblies missing for a module I use to work with MySQL.
To get started I created a Brand new Base Windows 10 Pro x64 vm in VMware Workstation. Be sure to enable nested virtualization on the VM (VTX). I also gave it 40gb storage and 8gb of memory.
Quick Reference for Software versions I used for this demo:
- VMware Workstation: 12.1.0
- VMware Powercli: 6.5 R1
- Docker for Windows: 17.03.0-ce-win1 (10296)
- Powershell: 5.1.14393.206
Step 1: Install Docker –
First, Download Docker for Windows Stable version.

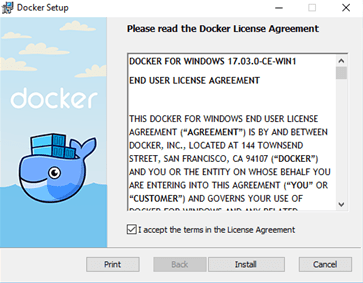
Double click the .msi, select the ‘I accept’, click install
Wait for about 30 seconds, and it finishes! Super quick. Go ahead and check the launch Docker box, and select finish.

You’ll see in the notification area that Docker will try to start.

But it will fail! Oh No! (It’s okay, we expected that since we did not enable Hyper-V)
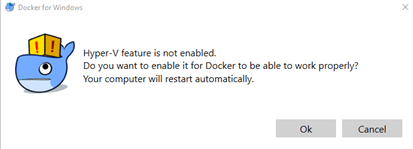
Select ‘Ok’ to allow Docker to enable Hyper-V. It will also restart your Windows Operating system in order to properly enable the Windows feature. Thank goodness for SSD’s!
One thing I like to do on my Windows operating systems is to show my Notification Icons on the task bar. Right-click on the task bar and select settings. Scroll down and select ‘Select which icons appear on the taskbar’ (Windows must be activated) <—– Not sure why?????
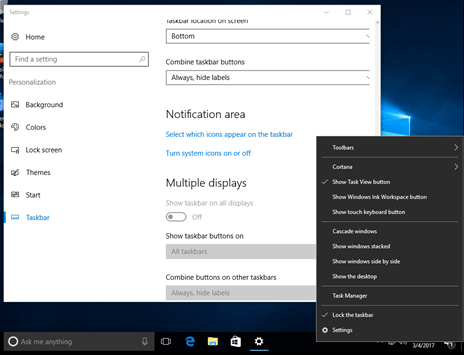
Then just swipe the ones you want or don’t want.

After the reboot, Go back to the notification area and right click on the Docker Whale (not that you have any other whales down there). Then select ‘Switch to Windows Containers…’

It will ask you to select ok, and Reboot to enable Windows Containers.

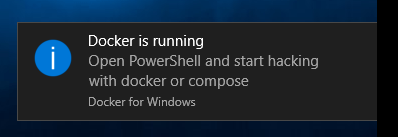
BOOM, It’s running, we’re ready!!
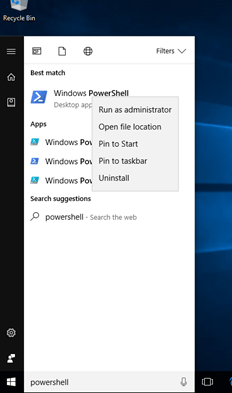
I also like to pin Powershell to the taskbar. Click the Windows button, type ‘powershell’ Right click, and select ‘Pin to taskbar’
Here are some reference links to the items we will go over
- Docker Cmd line cheat sheet
- Docker full cmd line reference documentation
- Docker Blog, Tag, push, pull your images
Step 2: Let’s get started!
Open up powershell (as admin) and run:
docker images
You should get some headers, with no containers listed.
Now run:
docker pull jpsider/invoke-automation
docker pull Microsoft/windowsservercore
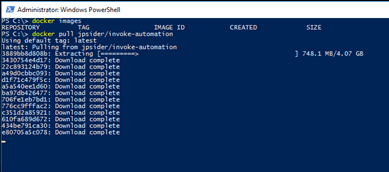
It may take some time to download, windows containers are much larger than the Linux ones. This will pull my custom Image that include : Powercli 6.5, PowerWamp, and PowerLumber on Windows Server Core
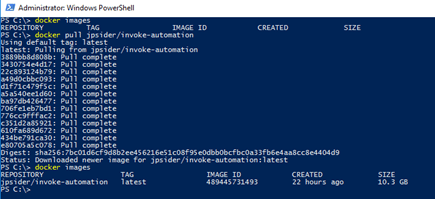
After it completes, run:
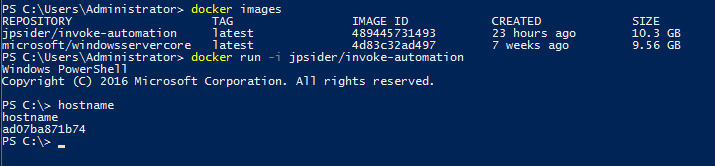
docker images
Now you should see the new jpsider/invoke-automation image!
Now let’s run the Container, type:
docker run –i jpsider/invoke-automation
It will open a console in your active console window. Type hostname, and hit enter (it should return the name of the container.
Now run these 2 commands:
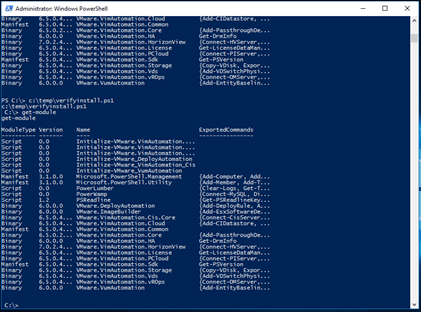
cat c:\temp\modules.log
c:\temp\verifyInstall.ps1
which will return the installed modules ran during creation of the image, then import them into the active console. Now type :
get-module
SWEET! Now we have a running container with our desired modules, lets get a new script to run! Use these commands to copy my file down, or any file you want.
$webclient = New-Object System.Net.WebClient
$filepath = "C:\temp\demoScript.ps1"
$url = "https://raw.github.com/jpsider/Invoke-Automation/master/Docker/demoScript.ps1"
$webclient.DownloadFile($url,$filepath)
This script will do a few things to prove modules are imported and everything is working as expected…
- Create and write a log file
- Connect to an esx server.
- Print out the Modules to console and log file.
- Print out the vm’s to console and log file.
- Query a remote DB for some info & print it out.
- Insert the VM data into the db
Simply run the script:
C:\temp\demoScript.ps1
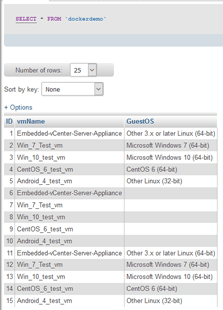
You’ll be able to see the VM information in the DB, and you can cat the log file.
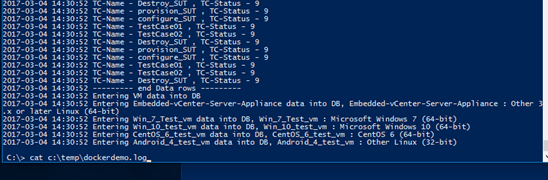
cat c:\temp\dockerDemo.log
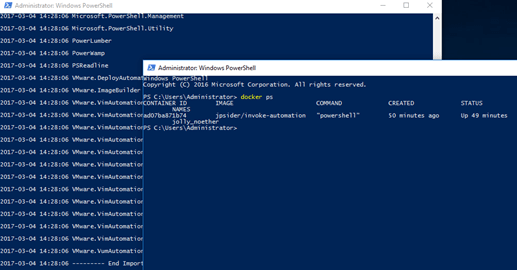
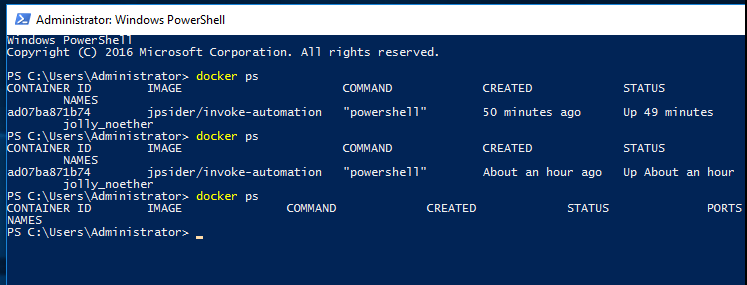
On your Docker Host, you can open a second powershell window and run:
docker ps
That’s it, head back to the container console window and type exit to kill the container.
In that second window run:
docker ps
Which will show its all gone now!
Hopefully you found this useful, I will have some follow up posts that go into more detail on how I am planning to use all of this together to manage Infrastructure systems.

One thought on “Using a PowerCLI+Windows Container, From the Top!”