Creating PowerShell RESTFul EndPoints

Yes, you can do this. No, its not ready for prime time……  yet! So what am I really talking about here? This is the beginning of creating very useful PowerShell applications on a modern application framework. It will allow you to use the same API calls to your PowerShell scripts that you might use with other services in your infrastructure.

Quick links:

okay….  but WHY?

  • Consistency
  • Flexibility
  • Versioning
  • Scalability
  • Ease of use
  • Security (kinda, only expose Endpoints you want/need)

This is a great platform to develop a ‘PowerShell Application Server’ that you can access with other Powershell scripts and other services can now access the same information that your PowerShell scripts can generate.

Now, the Why nots…

  • While its easy, its another layer.
  • Security (no SSL yet)
  • Memory (you MUST properly remove variables, and garbage collect!)
  • No SwaggerUI (hopefully you know what this is!)

So lets Dive in with a basic use case of getting some process information off of the OS.

First, just install the module from the PowerShell Gallery:


Install-Module -Name RestPS

There is only one exported function ‘Start-RestPSListener’ which requires no parameters. I do suggest you use them!

  • -Port (default is 8080)
  • -RoutesFilePath (Default uses the built in Routes which is not recommended!)

You can copy the file ‘Invoke-AvailableRouteSet.ps1’ to ‘c:\temp’ and specify this as your Routes file path. (I also recommend adding ‘Invoke-AvailableRouteSet’ as the last line of this file). This will allow you to reload the routes with each REST API call to your server.

Now, your first endpoint can be started up like this:


Import-Module -Name RestPS

Start-RestPSListener -Port 8081-RoutesFilePath "c:\temp\Invoke-AvailableRouteSet.ps1"

From a second console you can now run web requests to this new Endpoint.


Invoke-RestMethod -Method Get -Uri "http://localhost:8081/proc"

Invoke-RestMethod -Method Get -Uri "http://localhost:8081/process?vmware-tray"

It’s that simple! The Web listener will execute any command or script defined in your Routes file. If the Route is unknown a message will be sent back ‘Invalid Command’.

To shut the Endpoint down, send the following comand:


Invoke-RestMethod -Method Get -Uri "http://localhost:8081/Endpoint/Shutdown"

Below is an image of the Calls from each console.

RestCalls

You can see this is a very easy project to get started with. You can now put a pretty simple web front end on any of your scripts. Give access to outside users to run your scripts. Just use some caution! You only have to expose endpoints/scripts you want folks to have access to. I have not started the road down SSL yet.

Check it out, have some fun, give some feedback!

Reference projects:

https://github.com/cofonseca/WebListener?files=1

http://hkeylocalmachine.com/?p=518

Got vSphere API’s? PGH little hack, WPVMUG, and Ariel – not the Mermaid

I’mmmmmmm  back!

I’ve been quite quiet since VMworld, sorry! Life has not slowed down at all. Anyway enough about the boring stuff.

This past week I got to spend 2 days up in Pittsburgh to attend a TAM round Table headlined by Kyle Ruddy, a little Hack organized by Ariel Sanchez Mora & Carl Capozza, lastly the WPVMUG.

First, let me say, the people were GREAT! I’m sure I cannot mention them all, but here are a few: AJ Kuftic, Dave Kalaluhi, Dan Barr, Doug DeFrank. All of these guys were great to hang with and were super welcoming. I cannot thank them enough for their hospitality!

At the TAM meeting, there were a lot of great conversations with wide ranging topics. It was great to be in a room with very smart folks! Not to mention the diversity in skill sets. Its amazing how everyone uses the technology, but we all use it differently. It just proves that we all have so much to learn.

The PGH Little Hack was fun! I’m not sure that anyone accomplished a specific task. But I know that we all walked away with more knowledge! Just like the larger hackathons I think keeping scope small is key. It’s way too easy to get off topic.

Lastly the WPVMUG, these events are great, we get to see presentations from experts in our field with direct access to the presenter. Additionally my favorite part is that new speakers get their time to shine. This time it was Doug DeFrank and boy did he shine. You could tell he was a bit nervous before the start of his presentation, but as soon as it started he blew me away. His passion for his topic was unprecedented, the topic hits home for me, as I got started scripting the same way he described. I’m sure that Ariel will be posting a video, if I find it I will post the link. So thank you Ariel for getting Doug to speak, and Thanks to Doug for delivering a very good presentation. The workflow diagrams were great, but the passion will keep me coming back, I hope I get to see you on stage again soon! Check out his blog here.

Lets get to some Technical stuff…

One of the problems we had with the little Hack (and I could see in future events) is that we did not know what to do. Everyone had some idea’s but we never really ironed the details out. Now I don’t think that every little detail has to exist before you start one of these events, but having a plan or general direction is always nice. One of the constant themes we had over the 2 days was hearing folks say “I want to learn more about the vSphere API’s”. But no one really knew how to get started, or a way to really have it hit home. So I am here to propose the following, at least for folks with a similar skill set to my own…..  which consists of quite a bit of PowerShell.

I’ve started a new PowerShell Module called “PowerRestCLI”, which is just a PowerShell wrapper to the vSphere API. Now, I want to be clear: THIS IS NOT A REPLACEMENT FOR POWERCLI! This is not my goal, it is not the purpose of this Module. This is just a tool for folks to learn a new skill. Honestly my goal, whether it be for the Little hacks that involve the VMwareCode community, or if someone just wants to learn a little, is for them to contribute to the Samples.

I have submitted a Pull Request that includes the Module to the vSphere-Automation-sdk-Rest project on the VMware Github site. If the folks in charge do not agree that the samples/module belongs, I will simply support the module on my personal GitHub repository. This is not new information, as I pulled stuff from the following blogs, Luk Dekens (go figure…lol), Chris Wahl (no surprise here) and Chris Bradshaw. I am just extending their work, to hopefully help others in the community.

Here are the skills that I believe folks will learn while contributing:

  • Deeper PowerShell skills
  • How Rest interfaces work
  • GitHub methodologies
  • vSphere Rest specific knowledge

I’m sure I am missing something, but these are the things that all the guys were asking about while I was in Pittsburgh.

Here is a peek at the module I started and what it includes:

  • Download the module (not available in the PowerShell Gallery yet).
  • Edit the ConnectionVariables.ps1 file to update the Name/IP of your vCenter
  • Import the Module
  • Connect to the vCenter
  • Pull the list of VM’s

Yes, I know, its not much. But its a start, and the formats are fairly similar.

Module Name – PowerRestCLI, Go ahead and import it.


Import-Module <PathToModule>\PowerRestCLI.psm1

Next, connect to your vCenter:


# This will prompt you for UN/PW
Connect-rVIServer -vCenter $vCenter
# Or specify the UN/PW
Connect-rVIServer -vCenter $vCenter -User Administrator@corp.local -Password VMware1!
# Or use a Credential already set
Connect-rVIServer -vCenter $vCenter -Credential $creds

This command returns:

Name Port User
---- ---- ----
192.168.2.220 443 administrator@corp.local

Once you are connected its easy to get the list of VM’s!

 
Get-rVM

Notice all of the commands have a lower case ‘r’, to designate this as a “REST” command vs. a normal PowerCLI command. Note, ‘Get-rVM’ does not support filtering yet! Add this to the next little hack!

All of this sounds really cool, but do we get the same information? YES! kinda.

Here is the typical formatted return of PowerCLI’s ‘Get-VM’

PowerCLI output
Name PowerState Num CPUs MemoryGB

---- ---------- -------- -------

Win_7_Test_vm PoweredOff 1 2.000

Win_10_test_vm PoweredOff 1 4.000

CentOS_6_test_vm PoweredOff 1 2.000

Embedded-vCenter-... PoweredOn 2 10.000

And here is ‘Get-rVM’ output:

name power_state cpu_count memory_size_MiB

---- ----------- --------- ---------------

Embedded-vCenter-Server-Appliance POWERED_ON 2 10240

Win_7_Test_vm POWERED_OFF 1 2048

Win_10_test_vm POWERED_OFF 1 4096

CentOS_6_test_vm POWERED_OFF 1 2048

Sorry, wordpress kinda sucks with formatting. Notice any differences?

PowerState(PowerCLI) is different than power_state(PowerRestCLI). CPU/Memory also have differences. Note that in the second example, the full name of the VCSA is displayed by default. These can be overcome with some code, but it is interesting that the returns are slightly different. I’m curious if this is something nice PowerCLI does for us in the background.

It is clear that the information is available, and that is the goal of this module! I hope that it is accepted into the Samples, and that more and more folks can learn how to use the vSphere API through PowerShell. There is also potential that at some point in the future that the vSphere API may have a setting available that PowerCLI does not, Now you have the power to make the change in PowerShell!

Thanks for reading! Hit me up on Twitter if you have any questions! @jpsider

What horse did you ride in on? VMwareCode #hackathon

HA! Tonight was a pretty rewarding and humbling experience for myself. I was fortunate enough to lead a team at the VMworld Hackathon. Only, it didn’t start out as I had planned. While I knew that signups for my team was low, I did not expect to go solo. Not one of the folks who signed up for team #SweaterVester showed. One guy even sat down and started to set up his laptop, as we were talking he learned he was at the wrong table…..  DOH! lol

The good news (I think) is that I earned a new nickname, ‘The lone Ranger”. The bad news, well there is none. I had a wonderful time. I cannot thank the organizers, participants and judges enough for all of their kind words and support during and after the event.  It’s an awesome experience and I wasn’t going to let a lack of participation from other ruin my time!

I started out with some pretty far reaching goals, but quickly adjusted them down to work I believed I could complete during the event. At the end of the night, I was able to demo a brand new working feature to my OpenSource Project XesterUI. It was very rewarding to be able to complete the work in a short amount of time, and be able to demo the work live in front of a fairly intimidating group. I also found about 5 or 6 bugs, but those will have to wait until after VMworld.

If you want to learn more about the project I was working on, you can check out XesterUI on Github. Additionally on Thursday at 11:45 I have a vBrownBag presentation (located in the VMvillage) to talk about more of the features and details that will help you understand what this tool can do for you, your organization, and your vSphere environment.

A Very special thanks to Lily Chang, William Lam, Alan Renouf, and Chris Wahl for their kind words and encouragement this evening. This is by far one of my favorite events at VMworld! Food, Friendly competition, great conversations, and Beer. What more could you ask for?

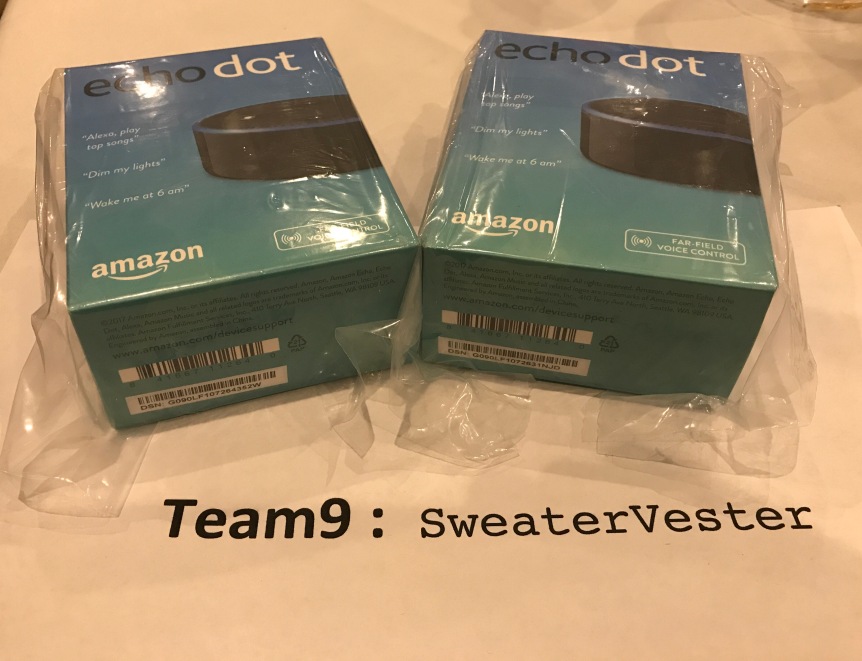
While I didn’t win 1st place……  I did get to take home two Echo Dots! Which I will put to good use!FullSizeRender

Bravo Vmware Code, Bravo.

vBoxing Final details

Thank you for your patience as I tried to find the lowest price location, that would confirm they could show the fight!

Well, that was much more of a pain in the butt than anticipated! I was a bit shocked at how the MGM can lock down the Strip, not allowing bars/restaurants to air a PPV event. Additionally the MGM properties were charging $300+ per person to watch at their facilities, and would not take reservations for parties, or negotiate prices. Anyway, here are the final details (I will update the eventbrite page as well).

  • Location: Blondies Sports Bar & Grill @ Miracle Mile Shops Located in Planet Hollywood
  • Date: 8/26/2017
  • Time: 5:00pm(pst) ~ ????
  • Cost: $150 (At the door, You are responsible to pay your own cover charge)
  • Includes: Draft beer, rail drinks, You get to watch the fight!

Note! They are not, have not, will not accept Reservations! It is first come first served starting at 5pm(pst). They have made this perfectly clear. So this is more of a gathering, not an event. You do not need an eventbrite ticket, it will not do you any good! 

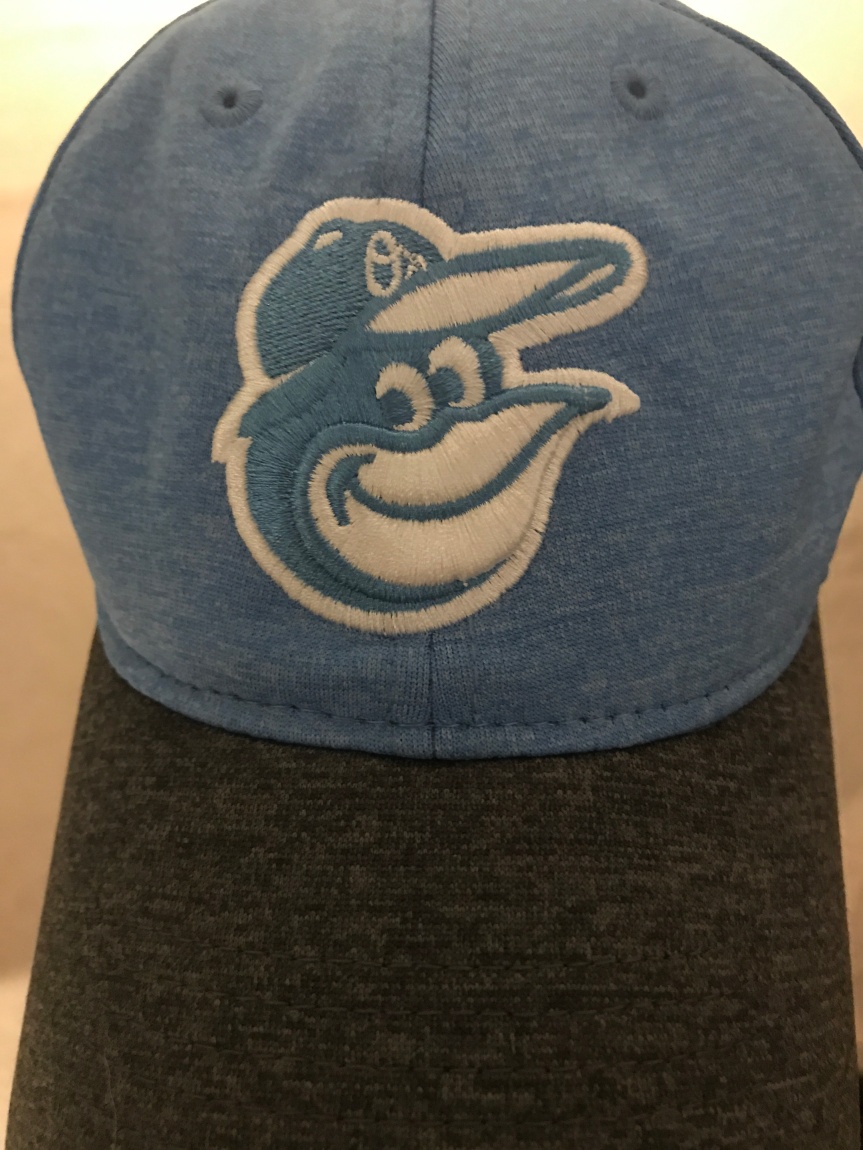
If you are looking for me, I will be wearing the hat below. I imagine I will be the only one with it in Vegas.

Hope to see you there! #siderhouserules

Hat

VMWorld 2017 #siderhouserules

By my count, I have about 5 weeks and 2ish days until I hop on a plane for Vegas, and my favorite conference of the year! There are quite a few posts about what first timers should do, where and how to focus your time, etc. And I think I can relate to pieces of all of those blogs. No need for me to link to them, you can search on Twitter or google.

I’ll give you a few of my thoughts and highlight where you can find me this year.

I’m lucky enough in my day job that I get to play with all of the technologies, I’m not just the NSX guy, or the vCenter guy, or the VDI guy. So each year as VMWorld approaches I look at the technology landscape to see:

  1. What interests me (whether it be work related or something freaking cool)
  2. What I can apply to my current role
  3. What sessions apply to 1 & 2
  4. What vendors apply to 1 & 2
  5. What extra curricular activities apply to 1 & 2

Usually I am going in with 1-2 topics in mind. This year is no different and that list includes vSphere Integrated Containers and NSX. Focusing more on VIC for session related activities. I am very interested in road-map items like Windows in the VIC. Hint Hint for anyone who wants to meet up about this, or if there are any VMware folks who would like to talk. I have some use cases that I would love to run down. I will also be spending some time on the VIC HOL’s.

Every year I say to myself:  “forget the parties, you are too old, you need sleep” and every year I go home tired, super tired. I really enjoy the entire atmosphere of the event and extra’s. There are so many people you get to meet, ones that are doing similar things, and ones that are doing things you cannot even comprehend! It’s just nice to talk to folks that you can relate to.

OK, enough already, here are my 3 bullet point tips for anyone going.

  • Wear comfortable shoes.
  • Say hi to the person next to you.
  • Be present, and take advantage of each opportunity to grow yourself, intellectually and personally.

And here are my things NOT to do(#siderhouserules):

  • Don’t take pictures of slides.
  • Don’t take another persons opportunity, if you sign up, SHOW UP!
  • Don’t breathe while you are in the men’s room.

brposter.jpg

I have a few vBrownBag presentations this year! Come watch live! I think it is so cool that these presentations made it into the conference schedule. Huge thanks to the @vBrownBag team, you guys are AWESOME! If you want a live demo on anything I am presenting just shoot me a message or tweet.vmworld2017.PNGWhere will I be all week? For starters, look for #siderhouserules on twitter.  (note, I plan to be at all VMWorld sponsored events):

SaturdayvBoxing

Sunday MorningvGolf

Monday Night – @vmwarecode Hackathon (no link/details yet)

Tuesday – TBD – Hoping for a TopGolf party!

Wednesday – VMWorld Party

Thursday afternoon – Friday night – Open for some idea’s. Last year Brian Graf led a group of us on a #vHike through Zion National park it was phenomenal! I’m not sure if he is doing something similar or not this year. But I would love to see part of the Grand Canyon this year. So if someone is interested in setting up a trip south, let me know!

I hope everyone enjoys the conference! I need to get back to work on my presentations!

vBOXing – Catch the ‘May-Gregor’ fight before VMWorld 2017

Update(7/11/2017)

I’ve reached out to several of the sports bars, some of them have responsded back citing they may not know if they can show the fight due to licensing with the MGM and associated properties. I’ll keep you updated.

Original post below.

It’s not what you think! I’m interested in watching the fight somewhere in Vegas the night of Aug 26th. There is no better way to meet some new folks then to get together and watch 2 guys beat each other up. So come out and get VMWorld 2017 started off right!

34c43cbb00000578-0-image-a-19_1464595706169.jpeg

Check out the event here, and note that I will be updating my blog and the event with updates when an exact time and location are figured out. Let me know if you have any questions/suggestions. You can join the event with the link below:

https://www.eventbrite.com/e/vboxing-vmworld-2017-tickets-36034791030

You do not need a ticket. You do not have to bring a ticket. This is an open community event. I am using the event to track the level of interest for when I reserve space at the final destination. It will be a first come, first served basis the night of the event.

Note, this event is not affiliated with VMWorld or VMware all expenses are the responsibility of the attendee’s. Please drink responsibly.

I rode my first Whale, DockerCon17

I attended my first DockerCon last week, here are my final thoughts;

Docker is here to stay! Which is a good thing, but I can see the passion in all of their employees, and they are going to continue to evolve their product line to provide the software development and operations world great tools.

My goals for the conference were to see not only how I can apply this to my everyday life at work, but how I can apply this technology in my open source projects as well. Hopefully I could meet some great resources along the way! Oh, and eat some Brisket, mmmmmmmm brisket!

Likes: This conference was super focused, nothing even the slightly bit not related to containers was mentioned. It was nice to not have any distractions. The staff conference and Docker were extremely nice and helpful! I liked that the vendor expo had extended hours, many times I go to a conference and I am forced to choose between attending sessions or talking with vendors at the expo, I didn’t have to do that at Dockercon, plenty of time for both.

Dislikes: The workshop I signed up for was horrible, we spent the first 30 minutes doing hands on work, and the other 2.5 hours listening to two guys read their slides, it was not very helpful. Overall, I wish there would have been more Windows content, I know its new, but it was lacking. In general I feel like there could have been more sessions. It appeared that all of the “here’s how we did it” sessions were from big huge companies, nothing in the SMB range to compare myself to. My last criticism is that the community theaters were horrible to attend, people were pushing and shoving to get closer, because it was very very difficult to hear. I liked the concept, but the delivery just didn’t work out.

Takeaways:

  1. I’m very interested to learn more and test drive VMware’s VIC (vSphere Integrated Containers). Due to the fact that I work with VMware products a lot, it seems like a logical decision. I also like that they are providing a complete solution here, with Harbor, Admiral and the Photon Platform (minus Windows).
  2. Windows has a long way to go. It works, but its not ready for prime time. The images are too large, and the application pool is too low for it to be a versatile and enterprise solution. It may be useful if someone is already running Hyper-V as their hypervisor, but I assume this is not the case for most.
  3. Less is more! I learned quite a bit, however the message that never changed was to continue to reduce the size of the container images! Abby Fuller had a great session on this that kept playing over in my head.
  4. YOU ARE NOT ALONE!

What now?

  1. I already updated my Windows images to conserve space. I saved about 1gb on my PowerTools image, and several mb on my Nano Image by following some simple tricks learned in the Abby Fuller session. Check it out on Docker Hub.
  2. Soon Windows will allow you to run Linux and Windows containers at the same time from the same host OS, this is exciting. This will allow me to create a small application on a single host, without having to use a Windows application stack, but use my powershell containers for processing the work.
  3. I also learned how the layers of the Images worked, and that I should avoid leaving files on the layers to conserve space. This forced me to upload some of my modules to the Powershell Gallery to provide easy installation, and a smaller footprint. So that’s kinda cool!
  4. I need to get to it, and start developing a plan to migrate from vm’s to containers!

Last, but not least:

I was worried that I was very behind the curve on Docker, but in talking with quite a few of attendees, it appears we are all in the same boat. There is plenty of help out there and many folks that are in your same situation. Join the community, join the slack channels, and start asking questions. It’s a very helpful and welcoming community, which is very refreshing! Give Docker a test drive and see how it can help your organization run faster and leaner. I encourage everyone to throw a bathing suit on and go ride a whale!

PowerTools – Windows/VMware Powershell Module Docker Image

I’ve updated my Windows Docker image to include PowerNSX, PowervRA, and Vester. Why? just because. I’m sure there are folks out there who may want to run and explore with Docker for Windows and Windows containers. So why not use a container that you can apply to your daily tasks as a VMware admin?

You can check out my previous blogs on Docker and PowerCLI to understand how to get your environment setup.

The really cool thing about the Docker container is that you are guaranteed a clean consistent environment each time. And its quick! (Well after the initial download of the container).

Here is the list of available modules in my new Docker Image:

Here is how to pull the image from my repository on Docker Hub:

docker pull Microsoft/windowsservercore
docker pull jpsider/powertools

When you run the container you can execute the following command to import the listed modules into the active powershell session:

c:\temp\ImportModules.ps1

ImportedModulesHopefully you can find this image useful in your environment. And let me know if I missed any Community modules you would like or that I missed.
XesterUI – A Vester User Interface

Introduction to XesterUI

Hi everyone! This idea really stemmed from the VMworld Hackathon Vegas 2016. Yes, it really took me this much time to get this thing put together. I think that the project was initially intended to be used with Pester and NSX. This new project is a user interface that wraps Vester. The hope is that it will expand to other Powershell unit/integration tests, or configuration management tools. I’d love to start playing with PowerNSX and Vester!! The great part about this tool is that you can share a single interface with a team or group of system administrators, not everyone will need to install and run command line tests. I work on a team of 11 folks with varying levels of skills, this tool allows us to share a single interface to inspect our entire vSphere infrastructure, remediate configuration drifts, report on problems, and compare historical data easily.

Right now the project is completely separate project than Vester. Somewhere in the future we will need to determine what the right model will be and whether or not to start integrating the two code bases. At this time there are no code changes needed in order to run XesterUI on top of Vester.

Side note, I do not claim to be a web developer. I have chosen the WAMP stack because it is  very easy for a System Administrator to manage, update, and customize. This tool is intended to be functional first, pretty second. I will take any help I can get with making the pages prettier, but I will not sacrifice looks for the ability of a junior or mid level SA to make changes that could help their organization.

Lastly, this is a Beta release. I’m interested to get feedback on whether this will be useful, or improvements and feature requests, nothing is off the table at this point!

Components/Nomenclature

  • TestRun – A set of specified tests that run on specific Targets.
  • System – A group of Targets, must contain at least one vCenter
  • Target – A single vSphere entity, vCenter, Host, Cluster, vm, etc.
  • Queue Manager – Manages the Queue of tests, assigns them to an appropriate TestRun Manager, also aborts cancelled testruns.
  • TestRun Manager – A process that can execute a TestRun workflow.
  • Workflow – A wrapper script for Vester.
  • Database – Collects all of the meta data about the vSphere systems and TestRun results.
  • User Interface – Set of web pages where you are able to slice and dice the TestRun data, submit TestRuns, Remediate, etc.

How does it work?

XesterUI simply wraps Vester right now. There is a workflow script that is executed by the TestRun Manager.  The wrapper script gets test information from the Database, executes Vester specifying the config.json file and whether or not to remediate problems. After the test completes the script parses the XML result file, and imports the TestRun data as records in the Database. Once the data is imported, the user is free to view, sort, and filter the TestRun data.

Setup/Deployment:

Setup is not difficult, I’m still working on a deployment script (and better documentation) that will make things fairly simple, until then follow these quick directions (and let me know if you have any problems):

Download and install:

  1. WampServer 2.5 or newer
  2. PowerWamp project (place in c:\openprojects\PowerWamp)
  3. PowerLumber project (place in c:\openprojects\PowerLumber)
  4. XesterUI project (place in c:\openprojects\XesterUI)
  5. Vester (Follow Brians Instructions, they are great!)
  6. Powercli 6.5
  7. Create a ‘C:\XesterUI’ directory for Logs, and TestRun artifacts.
  8. Copy the XesterUI User Interface directory contents to ‘c:\wamp\www\XesterUI’
  9. As administrator, run ‘Deploy_Demo_Database.bat’ from ‘c:\openProjects\XesterUI\Database directory’.
  10. This will insert Sample data that you are free to update!
  11. Open 2 Powershell console windows, and start the Queue Manager Script in one, TestRun manager in the other (No args needed).
  12. Use Vester to create a ‘Config.json’ file (again, use Brians Blog).

Lastly, run your first Test (see images below)!

Note: The deployment of Components does not have to all be on the same machine. You can deploy the Queue Manager and TestRun Managers to different machines. Not sure the Queue Manager makes sense at this point. Additionally you can install the ‘AMP’ on a linux host, so long as it will have access to a CIFS share where the log files are accessible to all parties. Setting up multiple TestRun Managers could prove to be very useful if you have multiple sites and low WAN speeds.

Status and Results:

Here is a list of the status and results included in the Sample Data. I Highly recommend you use the default ID’s and Text Status/Result. Feel free to change the HTML color though!

Status: (ID,Text Status, HTML, Text color)

  • (1,’Down’,’#CC0000′,’Red’)
  • (2,’Up’,’#006633′,’Green’)
  • (3,’Starting Up’,’#FFFF00′,’Yellow’)
  • (4,’Shutting Down’,’#FF6600′,’Orange’)
  • (5,’Submitted’,’#666666′,’Grey’)
  • (6,’Queued’,’#FFFFFF’,’White’)
  • (7,’Assigned’,’#6699FF’,’SkyBlue’)
  • (8,’Running’,’#0066FF’,’Blue’)
  • (9,’Complete’,’#00CC66′,’LightGreen’)
  • (10,’Cancelled’,’#333333′,’Charcoal’)
  • (11,’Enabled’,’#006633′,’Green’)
  • (12,’Disabled’,’#CC0000′,’Red’)

Results: (ID,Text Result, HTML, Text color)

  • (1,’PASS’,’#006633′,’Green’)
  • (2,’FAIL’,’#CC0000′,’Red’)
  • (3,’CRITICAL’,’#FFFF00′,’Yellow’)
  • (4,’AGENT_ERROR’,’#9933FF’,’Purple’)
  • (5,’ABORTED’,’#FF6600′,’Orange’)
  • (6,’UNKNOWN’,’#666666′,’Grey’)

sooooo Let’s See It!

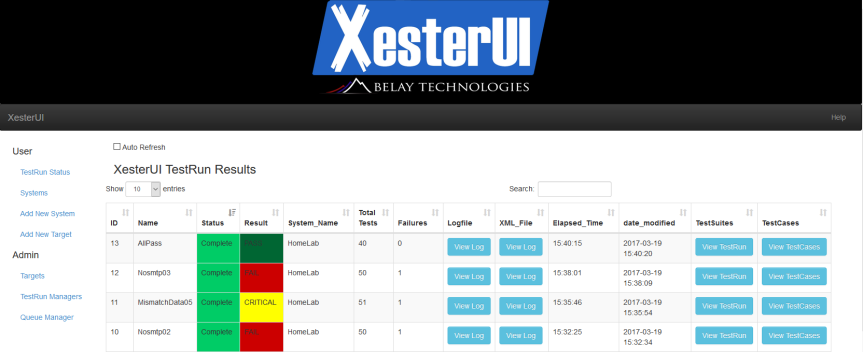
Here is the first page you come to when browsing to http://webserver/XesterUI

Status
XesterUI Home/TestRun Status page

The result of an overall TestRun will bubble up from the lowest test case.

  • A critical result means that the Total number of testcases reported in the XML, did not get inserted into the database.
  • Pass means that ALL testcases passed, and are accounted for.
  • Fail indicates that at least 1 test case has failed.
  • Agent_Error indicates that the system failed somewhere.

From this page you have several options, You can view the TestRun logfile, or Result XML.

There are two options for viewing Testcase results for a specific TestRun. Drilling down by TestSuite, or viewing all Testcases.

From the TestSuite page, you are able to drill down and view the Testcases:

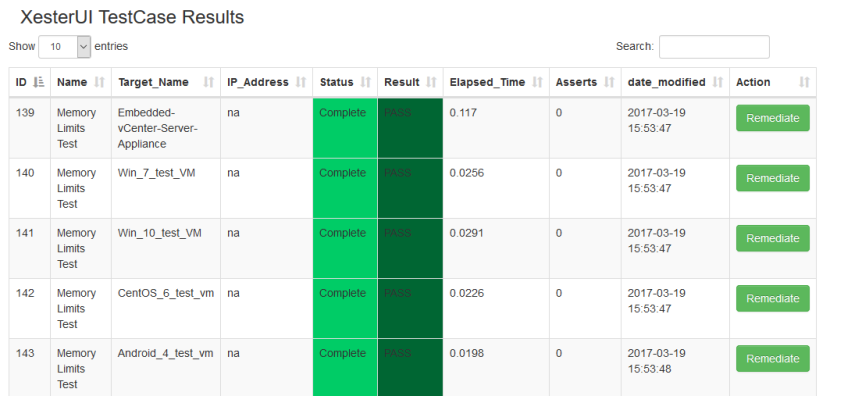
testsuite_TCs
Lowest level drill down, all test cases for a specific TestSuite in an overall TestRun.

On most of the UI pages you are able to sort any column and filter on strings. If a test case has failed, you are able to view the stack trace, and are able to resubmit the test with the remediate flag.

Stacktrace
Stacktrace message from a testcase failure.

Submitting a new TestRun is easy, Click the Systems link, and in the row of the system you’d like to test, enter a TestRun name, specify if you want to remediate, and click ‘Submit TestRun’.

listSystems
PHP requires and escape character in Windows paths!

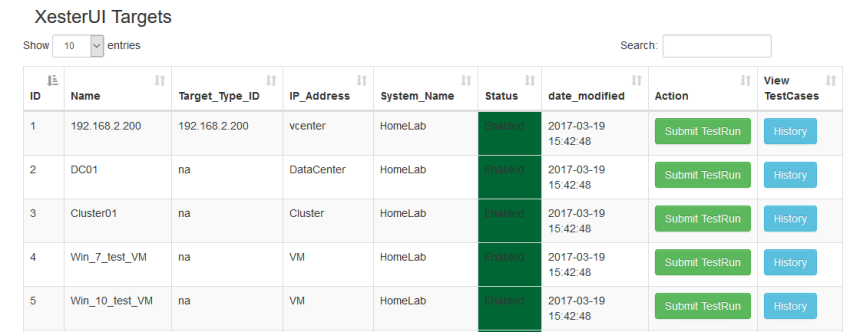
You are also able to view the targets from a specified system or all systems.

targets
View targets from one or all Systems.

Additionally, if you click on a target you have the option to view all previous TestRuns and the results.

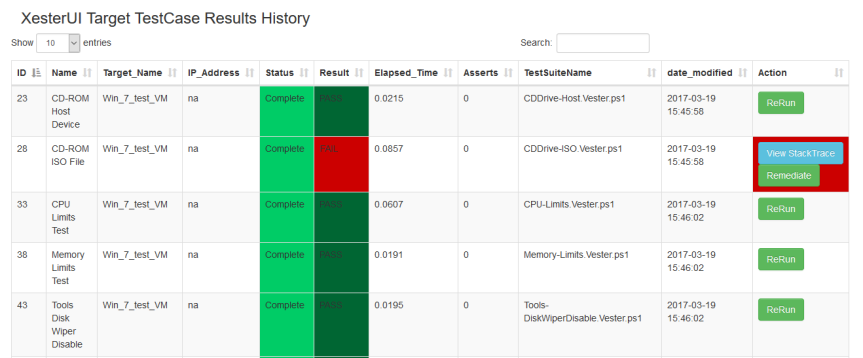
Target_History
Compare all testcases for a specified target.

Creating a new System and Target are easy, simply fill out the supplied forms.

Lastly, you can view the Queue Manager and TestRun manager log files from their respective pages. Additionally you can shutdown the Managers. There is a ticket in to be able to start those components. The log files for TestRuns and the manager are stored in ‘c:\XesterUI\component‘ (Queue_Manager, TestRun_Manager, TestRuns\TestName_ID).

Hopefully this gives you an overview of all the features of this tool, and how it can be useful to have all of that data in a searchable/sortable format. Note that Targets do not need to be populated into the DB before you run your first test (with exception of a vCenter). If a target does not exist, it will be created when the XML is being converted and results inserted into the DB.

Upcoming Features:

  • Build config files on the fly for an individual ‘target’ or groups of ‘targets’.
  • Mulitple vCenter’s per system.
  • Ability to create a config.json file by clicking through the web.
  • Creating a useful exportable report (potentially email reporting).
  • Ability to abort a test.
  • vCenter config.json files are more appropriate than ‘System’ config files.

Feel free to review open issues and request features.

Known issues:

Currently a problem with the SMTP check not returning a vCenter ‘Target’ in the XML. This causes a problem with inserting the data into the DB. I know the Target is a vCenter, but I am not given the Target name. I’ll work on tracking down why that’s missing.

Security:

I’m not a security expert. So taking a look at WAMP best practices might be prudent in your environment. I can certainly give you advice, but do your due diligence and make sure you are meeting your organizations goals for security. There are several area’s of this product that could present a security risk. Keep in mind this project is currently in beta, and will continue to grow in maturity over time. Let me know if you have any questions or concerns.

Scripting with VSCode is Awesome! Import Custom Modules to Intellisense.

I absolutely fell in love with using Microsoft’s VScode for writing Powershell Scripts. One of the best features is the ability to import custom modules into the Intellisense feature.

It can be a simple or complicated script. Luc does a great job with his script to capture all kinds of options for PowerCLI on his blog. But what about other modules you might want to use?

Simply add them to the script located here (you might need to create it first):


C:\Users\<USERNAME>\Documents\WindowsPowershell\Microsoft.VSCode_profile.ps1

Here is my example profile script:

Function Enable-Modules
{
Get-module -listavailable vmware* | Import-Module
Import-Module C:\OPEN_PROJECTS\PowerLumber\PowerLumber.psm1
Import-Module C:\OPEN_PROJECTS\PowerWamp\powerWamp.psm1
}
Enable-Modules

That’s it, 7 lines and I have import a ton of functions that will help me speed up the rate at which I can write custom code/scripts. With the newer versions of VScode it is not necessary to update your preferences to load a powershell profile. It just loads it by default now. Oh, of course this does require the powershell plugin!

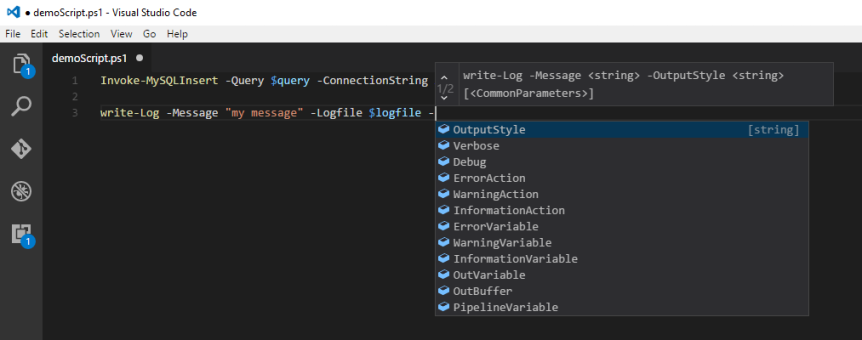
Once you create your Profile script to import your specified modules, simply reload VScode. Open a Powershell file, and witness the magic. See below, the ‘Invoke-MySQLInsert’ is a function from one of my imported modules PowerWamp.intellisense

And this shows my other custom module PowerLumber:

lumber

Think about how much time ‘tab’ completion saves you in the console, and its available in VScode!